Tuesday, October 13, 2009

Autumn Colors

This is the time of year in New England, when all the trees start adjusting to the upcoming winter by turning all their leaves to beautiful colors. It's an amazing site. I truly miss the New England Fall down here in Florida, but the colors can still be found.
One January while photographing the skyline of Miami, I noticed that many of the Sea Grape leaves along the coast were changing color.

At first I only saw dying green leaves turning orange and brown, but it wasn't long before the  beauty of these great leaves became apparent. The post following is a short video of some of the brightest leaves that caught my attention. The first and last slides are not really sea grapes, but they were taken around the same time of the year, and I thought they fit in.

Autumn Colors - Sea Grapes

Friday, October 2, 2009

Lakes Park, Fort Myers, FL


There is a beautiful park in the middle of the city of Fort Myers, FL. These photos were taken at sunrise, between 7:00 and 8:00 AM. Clicking on the image links you to a collection of photos on Picasa Web Albums, named Lakes Park.


Lakes Park

Monday, September 21, 2009

Doors 09

Read the 2 posts below for a little background on this video.

Digital B&W Negatives Become a Video ...

Digital B&W Negatives Become a Video Slideshow

After finishing all the photographing of my old 35mm negatives, I have begun cleaning them up (removing dust spots, scratches, etc.) to use them in new fun and creative ways. The plan was to make a a slide show or video, using Picasa.

I started by picking about 120 photos taken during the 1980s of doorways around Portland Maine. I was looking for contrasts, textures, and even occasional humor in the images. Picasa has a feature called, "Retouch" found in the Basic Fixes tab that is fairly useful once you get the hang of it, for removing the occasional dust spot. I tried to use it exclusively, but found myself resorting to Photoshop Elements every now and then (and don't forget our old favorite, GIMP). I think if I become a little more familiar with Picasa's Retouch, I will probably use it more often.


Making a slide-show is really making a movie, or making a video. Once I had settled on about 50 useful images I selected them in Picasa and chose the Make a Movie icon at the bottom of the screen. A window of tabs, similar to the edit tabs opens at the left of the screen, allowing you to add a sound track, change resolution, create transitions, and add text slides. All in all, not that bad. However the sound track never sounded right to me, so I finally left Picasa's Movie maker in the dust.

There seem to be quite a few choices in free movie movie making programs. Windows Movie Maker comes free with Vista and XP, and there is a new version that is part of the recent "Windows Live" effort from Microsoft. Then there is Pinnacle's VideoSpin, also free with a bit more features than Movie Maker. And don't forget Cinelerra, Open Movie Editor, and Kdenlive 0.7 for Linux. Well, I didn't choose any of these. Instead I used Photo Story 3 for Windows. It too is free, but you have to download it from Microsoft. The URL is so long, just do a Google search.

I have used Photo Story 3 for Windows in many of my slide-show classes. The thing I like best is the ability to customize the start-stop locations of the "Pan and Zoom" motion feature within a single slide. The rest of the program is pretty straight forward with the final product being a wmv file along with a project file (.wp3), allowing you to go back and edit the movie without starting over. If you want more help with Photo Story 3 for Windows, check out http://www.papajohn.org/. I will probably, as time allows, try some of those other movie makers with latter projects. I 'll keep you posted.

The final slide-show/video Doors 09, is about 4 minutes long and can be seen over at You Tube.
http://www.youtube.com/watch?v=D3-jszGlXcI

Friday, September 18, 2009

Digitizing Black & White Negatives

During the 1970s and 80s, I spent a great deal of time working with black and white photography. Like so many others, I truly enjoy the beauty of a nice “gray scale” image. Using my 35 mm cameras and trusty old Tri-X, I created over 3000 images.

Peter & Petri.jpg Camp Gregory -52.jpg

I was teaching photography to high school students in Kennebunk, Maine during those days, so I had plenty of darkroom time. In addition, I built a few photo labs of my own at the various places I lived. I remember telling the photography students there would come a time when we used some form of electronic image capture in place of film. Some thought that sounded cool, others laughed.

Kennebunk HS -11.jpg

Most of my best black and white work made it into print form; 5x7, 8x10, 11x14, some matted, most just stored in boxes. I threw out many photographs, but I still have some of those original prints. (I even coated various materials, glass, leather, stone, with emulsion and made prints on those surfaces.)


Well I ended up with this binder of about 2800 35 mm black and white negatives, some were made into prints and have since been scanned, and others are still only negatives. (I also have a collection of slides, color negatives, and large format negatives, but that’s a story for another time.)

038.JPG

So about ten years ago, I decided that I would find a way to digitize these negatives. And now, the job is finally done. I used a slide copying adapter (Nikon ES-E28) that screwed on to the lens of my Nikon Cool Pix 4500. The 4500 was one of the best cameras in its day (and still has many design features superior to today’s digital cameras), but mostly I bought it because of the adapter. It not only has the ability to crop and zoom and thus copy 35mm slides, but it also includes a negative holder, that allows you to re-photograph 35mm film. I have never seen anything as versatile or convenient as this device, since. If anyone has any suggestions for similar equipment, please share this with us all.

035.JPG

Photographing 35 mm negatives has its problems – DUST. You will either spend hours cleaning your negatives or hours using computer software to remove the specs, but we had those problems when we printed onto paper from negatives. Then there is getting the light right. The adapter is illuminated by whatever light source you point it at. Over the years I got lazy sometimes and simply pointed the thing out the window, and cranked one negative through after another. This sloppy, uneven illumination shows in some of the negatives. And finally, this process takes forever (or ten years in my case). It becomes a bit tedious, and after a few hundred shots, one tends to put the project aside for a few months.

Well anyway, the photographing part is done (I still have the slides, color film and larger format negatives, but…). At this point I used a great program called Irfanview, http://www.irfanview.com/, to convert the negatives to positives and reduce the color level to grayscale. This can all be done in one batch process, using Irfanview.


There is something to be said for working with the positive (reversed negative) images while in color, e.g. not converting them immediately to grayscale. You can work with the different colors as layers to achieve effects similar too using filters. But I am happy just getting all those negatives into a massive collection of B&W images. Besides, the negatives were captured in color and are all stored as jpgs in color.

Now, what do I do with all 2000 images? I think I’ll make a movie with a few of them, limiting myself only to the tools found in Picasa, but that’s for a later post.


Tuesday, August 25, 2009

Trip Summer 09

Sorry, I did not get a chance to do a day-by-day posting of the trip's photos. The iPhone software for doing this has improved significantly - maybe next time. However, here are some highlights:

For a larger collection of images, click here to go to the Trip Summer 09 album at my Picasa Web Albums, or click the same link under palzot Albums on the sidebar.


Monday, July 13, 2009

iPhone Photo

By clicking on this photo, you should access the "iPhone Album" at pashley's Picasa photos.


-- Post From pashley's iPhone

iPhone single shot

No editing this time.


-- Post From My iPhone

New iPhone Panorama

Three shots stitched with Pano, sharpened in camera/phone, and posted.


-- Post From My iPhone

Sunday, July 12, 2009

iPhone Image

This is an unaltered iPhone image posted via Blogpress.


-- Post From My iPhone

Thursday, July 9, 2009

iPhone Panorama

Just outside the Naples Community Hospital is a beautiful park. It’s called the Garden of Hope and Courage.

Monday, June 29, 2009

Panorama Using the iPhone’s Camera

I am sitting in a chair in my living room looking over some of the photography programs at the App Store for the iPhone, when I come across an application (app) called Pano from Debacle Software ($2.99), so I download it. Within minutes it is installed on my iPhone and I am ready to go. Remember, this is my first panorama, created with Pano and the iPhone, and it is all done without leaving my chair. My iPhone is the 3G, not the very latest one (3GS).

During this photo shoot, I was sitting about 10 feet from the wall. The wall is about 40 feet long. I am using no tripods, and no special lighting. I simply take 5 exposures, using the clever overlay process the Pano app provides. When I am done, the 5 images are stitched together for me and saved in my photos on the iPhone. The final resolution of the completed panorama is 2200 x 788 pixels.

I must admit, I was so anxious to see how this looked on the “big screen”; I transferred the panorama to my desktop computer to view it in Picasa at full resolution, before posting it here. While in Picasa, I did apply a bit of “fill light” to make it look a little brighter, but I could have done all that with another app or two from the iPhone.

Well, it isn’t perfect but I am impressed! Look for more panoramas using the iPhone to be posted here.

Saturday, June 20, 2009

Sunset at Fort Desoto Park Beach


Fort Desoto Park Beach

These photos were taken at one of the nicest beaches in the US, Fort Desoto Park, located near Saint Petersburg, FL. The temperature was usually around 98 degrees, but when the gulf breeze came up, at the end of the day, it began to feel more like a breathable 90 degrees.


Monday, June 8, 2009

Creature Feature


I was looking down into the lake last Friday and noticed this strange looking creature. At first I thought it was an alligator, and then maybe a large fish, but neither seemed to fit the animal that I was looking at. It was at least three feet long, and maybe close to four. I was standing about 30 feet above the water and took the picture through a lanai screen. I was using a 12x zoom and a polarizer on the lens.
This must be how those Loch Ness stories start. Anybody know what this is?

Monday, June 1, 2009

When to Use the iPhone Camera and When Not

I was at the beach the other day, and I decided to use my iPhone camera. The temperature was over 90 degrees, there was no one on the beach, and it was very bright. I spotted a group of trees and thought I would try to capture the hot, bright barrenness. So I clicked an iPhone image and sent it to Twitter and Facebook. Now, you may know that it is nearly impossible to view a bright image on an LCD screen in the direct sun, it looked a bit dark, but I sent it into hyperspace anyway. Patricia had her Panasonic camera with her a she took a picture of the same scene.

When I finally got to see the image on a computer screen out of the direct sunlight, I can only believe that politeness alone prevented anyone from commenting on how horrible the picture was. It was so dark I hardly recognized the beach. Whereas the image made with the Panasonic camera looked correctly exposed. I have to believe that when the iPhone camera sees an overexposed scene, it does everything it can to compensate, and in this case it did everything, and overcompensated. The sky was bright, the sand was bright, and the water was bright, so the image ended up being murky dark.

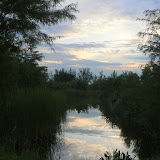
So when is the iPhone camera a good choice and when is it not? Well, if you are not in a hurry don’t use it. Use your other camera! However, if you need features like the ability to post on the Internet immediately, you have no choice, and the iPhone camera will have to do. But, don’t be like me – try to resist posting everything, be selective, and pass on the image if it is below your typical standards. See if you can figure out which photo was taken with the iPhone and which with the Panasonic.

By the way on the was to the beach we traveled through a cloud of what is known locally as “lovebugs”. Fifteen minutes of travel on route 41 and there were over 200 sacrificed “lovebugs”. I estimated about 100 splats on the windshield but the amorous lovebugs are usually found flying in pairs. It might have been more interesting tweeting a picture of that mess, but I was focused on finding a car wash and cursing myself for even venturing forth in the car.

We are preparing for another photo trip (see the proposed routes at the very bottom of these blogs) and will keep experimenting with sharing photographs through a collections of tweets, blogs and Facebook, and of course I probably continue to use the iPhone camera.

Monday, April 27, 2009

Title Slide

If you plan to create slide shows, you will most likely want title slides for these shows. Many of the “slide show generating” programs have some ability to create a title slide as part of their features. However, in this lesson we are going to make a stand alone jpg file. This image can either be a template for future title slides or the final title slide for a specific presentation.
Let’s consider two different types of starting images (jpg files) for our title slide.

The first one will be completely blank; white, black, or any color you choose. It will contain no text at first and will be saved as a file “TitleSlide white.jpg” in our My Pictures folder.

1. Start the Windows Paint program (it is found in the Accessories group)
2. When you see the blank screen, simply choose File, Save As, and save it as TitleSlide white.
3. Make sure the Save as type line says JPEG.
4. You now have a blank white image in your my Pictures folder.
5. If you want a blank blue slide use the paint can to fill the whole screen with a color.
Later, you can use this slide as a starting point (you will need to add text) within any program that creates slide shows, e.g. Picasa.

The second choice for a starting image will be an existing slide or picture.

1. Start Picasa (or any image editing program) and choose the image you want as a background for your title slide.
2. Open in as if you were to edit it.
3. Choose File, Save As and save it as TitleSlide.
4. Now you have a copy of both the original photo and one you can use as a title slide.

Let’s make a title slide out of either of these two images using Picasa.
1. Double click on the image as if to edit it.
2. With the blank color or the starting image slide you may wish to edit it a little. For example in the Tuning tab, you can play with all the sliders to make the image more or less dominate. The same thing goes for the Effects tab.

The original color slide can benefit from all of these alterations.

Finally it’s time to add some text.
1. From the Basic Fixes tab choose Text, it’s in the middle, right above the Fill Light slider.
2. Enter you title text anywhere on the slide.
3. Change the font, size, style, etc. to suit you needs.
3. Use the File, Save As dialog to save your final title slide, TitleSlide.
4. When it comes time to build your slide show, simply use TitleSlide as one of your images.

Full document available here Title Slide

Thursday, April 23, 2009

How Does a Blog Work?

It has come to my attention that not everybody understands how a "blog" works. Let's see if we can help clarify this confusion. A blog is simply a series of articles, separated by topic or date. In the case of palzot it is both. Think of a blog as a "column" in an ongoing periodical. The newest one is always on top and the older ones scroll to the bottom. Eventually some scroll right off the list. But they are not gone forever, rather they are stored in a place called the Blog Archive. I keep 15 posts active before it goes into the archive.

At the end of each individual blog post is a place for you to add your observation or opinion. This interaction is encouraged. You can e-mail me, but then no one else gets to share your wisdom. Post a comment, then all get to read it and add their comment. A separate window will pop up, just type your comment and click "post".

The right-hand side contains the sidebar, a collection of notices and links always available for your use. The top one is a slide show. You can click on the slides to pause and enlarge any given image. The handouts section is a collection of viewable and printable flyers, checklists, etc. I have used these in classes and workshops I have conducted. View, download, print, edit, or do whatever you want with these.

Palzot Albums are web albums (collections of photos stored at Google's Web Albums), usually based on one of my more recent experiments. Click on one of these and look around. You can build these web albums for yourself too, we'll talk about that some day-blog.

The Daily Photo Tip is a service provided by Mark Raymond Manson. They are short, easy to read, and informative. We thank Mark for this service.

Then there are the YouTube videos. You have to see the alligator one.

The Blog Archive contains all the blogs even those past their time. Look around here if you would like to explore or are trying to find some tidbit from the past.

Finally, we have links to other sites. This is mostly based on what I am interested in at the moment, but I hope to some day add you and the link to your collection of web photographs.

Now that you know all this, go ahead make a comment.

Wednesday, April 15, 2009

Analysis of the Trip09 Experiment

So the Trip09 experiment/adventure is over for now and what is the analysis?

Well, first off I've given up on one of my ideas, which was to eat at no "fast food" restaurants and only dine in privately owned small eateries. That was way too rigid and nearly impossible, 1. they are not easy to find, and 2. they are often more expensive since you can pick and choose and share when dining at a fast food restaurant. Also I found that the Fast food restaurants have really expanded their menus to allow for more lower fat choices. Short story watch yourself with those burgers, but do not be too fixed, try a little of everything.

Second the "Twitter-Blogger-Internet everywhere" world might not be ready for prime time. I am not talking about the wilderness here in Florida, and still I found too many places without 3G service. Twitting photos without 3G is a real pain, even with, it's slower than I want. Now without fast Internet access, blogging comes to a standstill. Most motels have wireless Internet connections, but not all.


Third the quality of the photographs suffers when you feel the need to document a particular stop. Some of the images I tweeted are not even worthy of "throw away", but I felt compelled to get something tweeted out. It is also the case that I became so overwhelmed with the technology that I forgot the art, or even the communication. This is a lot like owning the biggest bestest DSLR with so many lens and gadgets that you forget to take pictures.

What worked for hardware, software, and online services?
I used the iPhone for all the Twitter postings. Of course I always have my ClariFI close up lens attached to the phone. The TwitterFon app (http://twitterfon.net/) was used most of the time. It allows you to enter text, geo-tag (although I never got it to work correctly-maybe I just do not understand what it is supposed to do), and send the pictures. As long as there was a good phone connection, it worked well.

BTW, just saw this on the Twitterfon FAQs:
Q: TwitterFon doesn't upload my location
A: TwitterFon updates your profile location, doesn't insert the location info to your tweets.
I also used the Nambu iPhone app to view Twitter activity.

All the other photos were taken with the Panasonic DMC FZ18, clearly one of the most useful cameras I have ever seen, period. The images were transferred via the SD card reader (built in) to a Windows Vista laptop (Toshiba). They were cataloged, slightly edited, when deemed appropriate, and sent to Picasa Web Albums, all using Picasa 3.1. This worked very well. Once on Picasa Web Albums, some images were captioned and tagged with a location using Google Maps. I thought that this was going to be more automatic then it was, but still it was not difficult. The day's tweets were copied from TwitterFon's list and pasted into a blog entry at palzot. Finally the Trip09 album was linked to the palzot Albums sidebar at the palzot blog.

Will I do it again?
Darn tootin', soon as I get a chance. Probably this summer we will take a much longer trip and tweet/blog every last bit of it. Definitely be more aware of the photography and choose the blogged shots more selectively. Plan the stops more in advance (but I've said that before) and try not insisting on showing everything. (wow, lot of "ings" in that sentence)

Oh ya, and we'll just eat where and when we are hungry.

Monday, April 13, 2009

The Villages Car Show

After leaving Homosassa, we traveled through a no internet zone and very spotty ATT 3G area. This made blogging impossible and Twitting nearly impossible. The Google Map program on the iPhone was never able to keep up with the GPS reading, so it became useless. This is ironic because in the areas where you need maps the most there is no 3G signal, so even though you may have a GPS signal it will only be drawn on a lonely, grey grid on the iPhone (no maps).

When we arrived in Leesburg, 3G was back. We came across an auto show at the Villages (a massive retirement community with thousands of tricked out golf carts everywhere.) Tons of photos here, so let the tweats begin:

So black, light just falls into it. http://twitpic.com/34l4m from TwitterFon

Jazzd http://twitpic.com/34kpq from TwitterFon

Avanti 1964 http://twitpic.com/34kkm from TwitterFon

Even purple under the hood http://twitpic.com/34kec from TwitterFon

Can you identify any of these toys? http://twitpic.com/34jwq from TwitterFon

It's Howdy Doody Time http://twitpic.com/34jq9 from TwitterFon

Car show 3 http://twitpic.com/34jka from TwitterFon

Car show 2 http://twitpic.com/34jg0 from TwitterFon

The Villages Car Show http://twitpic.com/34jaw from TwitterFon

We are back in full blown internet access land so I am catching up on the blogs, and when it is all settled out I plan to comment on the pros and cons of such an adventure. BTW I noticed that Twitter messages are sometimes spelled "tweet" and sometimes "tweat". Do you have any preference? I think I am going to choose "tweet".

Homosassa Springs Wildlife State Park

This is a geat place to photograqph native Florida wildlife such as birds, reptiles and some mammals aquatic and land. And, of course, hippos - Oh wait, there is only one hippo native to Florida and that is Lu. Lu (Lucifer from movie fame) was granted Florida citizenship a few years back so he could stay in the park (all non-native animals had to go). Lu has lived at the park since 1964. He is over 49 years old and weighs 6000 lbs.

Other realtime tweats from April 10, 2009 follow:
Everybody's looking for manatees http://twitpic.com/33r2r from TwitterFon

Here comes Lu http://twitpic.com/33qwu from TwitterFon

Last nights stay. http://twitpic.com/33k46 from TwitterFon

Homosssss Springs (Manatee) Wildlife Park. Underway to see Lou. http://twitpic.com/33jzh from TwitterFon

That was a busy day, more in the previous post.

Thursday, April 9, 2009

Travel Log April 9, 2009

We made it from St. Petersburg to Homosassa with seven Tweets today:

1. Breakfast at the Comfort Inn http://twitpic.com/31kxyabout 9 hours ago from TwitterFon That's where we stayed last night, along with a young baseball team whose members had more energy than the rest of the motel.

All quiet so far.

3. Florida's largest book store. http://twitpic.com/31s0babout 6 hours ago from TwitterFon Been meaning to visit here for a few years. Plenty of books new and used but no really good deals. But then they were charging $3 for a hardcover at Goodwill just down the street. The Internet has spoiled me on book prices.

4. St. Petersburg Pier (beach). Not many people here. http://twitpic.com/31szu
All kinds of photographic ideas here.
We planned to eat at only non-chain, non-fastfood resturants on this trip, but so far have found that nearly impossible.

7. Sponge Capital of the World! http://twitpic.com/322tbabout 3 hours ago from TwitterFon
One has to like sponges or Greek food to stop here. We listened to an Irish band in the square. Gotta love that baklava.

Travel Log April 8, 2009

These are the six "tweets" sent via Twitter on the 8th. You should be able to click on the twitpic link to view the photos. The geo-tagging does not seem to be working at twitpic. All these photos were taken using the iPhone, some in a moving car through the windshield. I plan to work more on creating higher quality images. The picture to the left is an iPhone photo of some jewelry at the North Fort Myers Flea Market.

1. N Fort Myers flea market - busy! http://twitpic.com/2zztpabout 23 hours ago from TwitterFon

2. TTL Punta Gorda http://twitpic.com/303htabout 21 hours ago from TwitterFon

3. Stopped at RV World in Nokomis, FL Maybe our next trip will be in a class B. http://twitpic.com/30eofabout 18 hours ago from TwitterFon

4. North Port, FL: This looks like a spa or a natural wellness center. http://twitpic.com/307d5about 20 hours ago from TwitterFon

5. Crossing Skyway Bridge http://twitpic.com/30j0kabout 16 hours ago from TwitterFon

6. Bridge II http://twitpic.com/30j5pabout 16 hours ago from TwitterFon

Don't forget, you can follow the adventure realtime by becoming a pashley01 follower at Twitter.

Tuesday, April 7, 2009

Palzot Travel Log (PTL)

The mini road trip starts April 8, 2009. We plan to keep you up to date with mini blogs. If you have a Twitter account, search for pashley01 to follow. If things work well I will be sending photo links along with the occasional ‘tweet”. If this works well, I will explain how its done in more detail on the blog, or maybe have a special workshop.

If you don’t have or want a Twitter account, just return here every day or so. On the right hand sidebar under palzot photographers, click on Trip09. This will take you to a web album on Picasa named Trip09, containing the days photos. Most of these photos theoretically will be geo-tagged, meaning you should be able to see the photo location on Google maps.

Let’s give it a try. It could be fun. Don’t forget to leave a comment below this blog if something works well or not.

Monday, April 6, 2009

More iPhone Flowers


... or am I just bragging about the warm spring here in Florida? But wait, it is warm and the flowers are blooming (course some were here all winter long).
These photos were all taken using the iPhone with the Clarifi lens attached and a bit of Picasa tweaking.
(http://www.griffintechnology.com/products/clarifi?ICID=2)