Sunday, December 19, 2010


Monday, September 13, 2010
Learning the iPhone 4
Last Friday I decided to buy an iPhone 4.
I have been using the iPhone 3G for two years but there were enough improvements (camera, compass, iOS4.1) for me to warrant an upgrade.
While at the Apple store, I noticed there was a class on the iPhone 4 to be held the next day, Saturday, so I signed up.
During the class I watched how students were overwhelmed with all the different things the iPhone could do and they were jumping all over the place with their questions. This was an experience very common to my beginning computer classes, where students were so excited and wanted to know everything - and all at that moment! I often referred to this learning enthusiasm as a giant pill that could not be swallowed in one gulp, but had to be bitten off a little at a time.
With this realization in mind I decided to put together a small plan for “how to learn” about learning about the iPhone. My advice; take it a step at a time, master one thing and then go on to another. Limit your frustration, relax and have fun.
Start by learning about the following topics - one at a time. Pick the one that interests you at the moment, and then tomorrow, try another. This is just a partial list - the fun is endless.
iPhone 4 hardware
everyone needs this, start with the buttons, and then go on to memory, sensors, etc. as your curiosity grows.
I have been using the iPhone 3G for two years but there were enough improvements (camera, compass, iOS4.1) for me to warrant an upgrade.
While at the Apple store, I noticed there was a class on the iPhone 4 to be held the next day, Saturday, so I signed up.
During the class I watched how students were overwhelmed with all the different things the iPhone could do and they were jumping all over the place with their questions. This was an experience very common to my beginning computer classes, where students were so excited and wanted to know everything - and all at that moment! I often referred to this learning enthusiasm as a giant pill that could not be swallowed in one gulp, but had to be bitten off a little at a time.
With this realization in mind I decided to put together a small plan for “how to learn” about learning about the iPhone. My advice; take it a step at a time, master one thing and then go on to another. Limit your frustration, relax and have fun.
Start by learning about the following topics - one at a time. Pick the one that interests you at the moment, and then tomorrow, try another. This is just a partial list - the fun is endless.
iPhone 4 hardware
everyone needs this, start with the buttons, and then go on to memory, sensors, etc. as your curiosity grows.
 The Phone
Learn to make calls, what the bars mean, voice mail, proximity sensor, voice control, FaceTime
 Camera
still, video, HDR, flash, resolution, editing, panoramas, front and back cameras. The camera is a big one for me of course, and I’ll will explore more about it here at palzot as time goes on.
 Viewing Pictures
saving, copying from the internet and other sources, The camera roll, Albums vs Places
 Playing music
podcasts, songs, and YouTube, Netflix
 e-mail
read and send, create accounts
 Internet
Weather, Stocks, Google, Quick browsing
 PDA
PDACalculator, Calendar, Clock, Contacts, Notes
 iBooks
read thousands of free classics and ever growing number of purchased new releases
 Navigation
Maps, Google Earth, tag your photos with locations, geocaching
 All those other Apps
create an iTunes account, 250,000 additional things to do with your iPhone
- Now remember, this is an on-going learning experience. You cannot learn it all at one sitting. But that’s the fun part. You now own something you can continue to explore for years to come.
In addition to the digital Photography classes, I will be offering at home tutoring (and general help) on using the iPhone in your home at $35 an hour.
Tuesday, June 8, 2010


Tuesday, May 25, 2010
Downloading pictures from you camera
Downloading pictures from you camera’s media card, using Windows:
1. Insert the memory card into the SD (or appropriate card) slot.
2. After a short while the following window appears:

3. Choose Import Pictures. This copies all your pictures to the default “(My) Pictures” folder.
4. If you only want to copy only some of the pictures to your hard drive, use “Open folder to view files”.
5. You will have to navigate to the correct sub-folder on your SD card.
6. Then, click on the first picture you want and continue Ctrl-clicking on every other picture you would like to copy.
7. Finally, drag the whole collection to the folder on your hard drive (probably “my pictures”)
8. NOTE: The “Organize and Edit” and “Copy pictures to your computer and view them” choices only appear if you have Photoshop Elements and Picasa installed on your computer.
Monday, March 8, 2010
Freddy the Spider
Just in case you didn't get to see this bad boy over at Facebook I'll post it here also. While traveling in Georgia last summer, I came across a tree filled with these buggers, each about 5 to 6 inches long. Perhaps ants don’t have all the fun.
 Photographing spiders in their webs can be tricky sometimes, because the camera wants to focus through the web and on the objects behind it. However this fellow was so big, focus was not a problem.
 Photographing spiders in their webs can be tricky sometimes, because the camera wants to focus through the web and on the objects behind it. However this fellow was so big, focus was not a problem.
Tuesday, February 23, 2010
Ants
Ants, An Experiment in Macro Photography
Some folk get all bent out of shape whenever they see ants crawling about. Me, I think they are real helpful, cleaning up crumbs and such.

I had some crackers the other day, and left a crumb or two down there on the floor. If you look carefully, you can see it near the center of the picture, between the chair leg and table leg.

A bit closer and you can at least see the black spot. That’s a cluster of ants.

Even closer, you might be able to make out an ant or two. They are very small, some may say “tiny”, scientifically .33 mm long and .2 mm wide.

Now we are beginning to see something.

The ants will continue to chow down until this whole crumb is gone. I won’t bother them, and by nightfall, there will be nothing there. Ants are our friends.

Thursday, February 4, 2010
HDR or High Dynamic Range

This is a photograph of my neighborhood in HDR or High Dynamic Range. This picture is actually 3 exposures merged into one image. Do you think this fad is a keeper?
Images using HDR (High Dynamic Range) seem to be popping up everywhere. An HDR image consists of 3 or more exposures, usually one or two f-stops above and below the average exposure setting. This gives both the highlights and the shadows a chance to be shown at their best. Using either software and in some cases the camera itself, the multiple exposures are combined into one, giving the final image a pretty wide (dynamic) range of exposure. What place do they have in modern photography?
If you look carefully at my example, you will see three birds near the center of the image. There was actually only one bird in flight, but the time delay between exposures caught the bird at three different places. The three pictures were merged using a free HDR program called Qtpfsqui (http://qtpfsgui.sourceforge.net/) but there are others. Some of the image editing programs have HDR merge built right in and Photoshop plugins also exist.
So what do you think of the whole process? A lot of Flickr images are HDR. It is a fad that certainly was not around before digital photography. Some of the most recent digital cameras have HDR and its variations built in. These cameras actually claim to be able to produce a better images by exposing for shadows and highlights in the same scene. This would be very useful for nighttime photography and landscapes with dark shadows and bright skies. I look forward to seeing some very creative work done with HDR photography.

Wednesday, February 3, 2010
The Ole Church in Winter

Tuesday, October 13, 2009
Autumn Colors
This is the time of year in New England, when all the trees start adjusting to the upcoming winter by turning all their leaves to beautiful colors. It's an amazing site. I truly miss the New England Fall down here in Florida, but the colors can still be found.
One January while photographing the skyline of Miami, I noticed that many of the Sea Grape leaves along the coast were changing color.

At first I only saw dying green leaves turning orange and brown, but it wasn't long before the beauty of these great leaves became apparent. The post following is a short video of some of the brightest leaves that caught my attention. The first and last slides are not really sea grapes, but they were taken around the same time of the year, and I thought they fit in.
Friday, October 2, 2009
Lakes Park, Fort Myers, FL
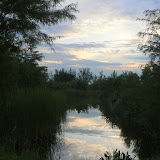
There is a beautiful park in the middle of the city of Fort Myers, FL. These photos were taken at sunrise, between 7:00 and 8:00 AM. Clicking on the image links you to a collection of photos on Picasa Web Albums, named Lakes Park.
 |
| Lakes Park |
Monday, September 21, 2009
Digital B&W Negatives Become a Video ...
Digital B&W Negatives Become a Video Slideshow
After finishing all the photographing of my old 35mm negatives, I have begun cleaning them up (removing dust spots, scratches, etc.) to use them in new fun and creative ways. The plan was to make a a slide show or video, using Picasa.
I started by picking about 120 photos taken during the 1980s of doorways around Portland Maine. I was looking for contrasts, textures, and even occasional humor in the images. Picasa has a feature called, "Retouch" found in the Basic Fixes tab that is fairly useful once you get the hang of it, for removing the occasional dust spot. I tried to use it exclusively, but found myself resorting to Photoshop Elements every now and then (and don't forget our old favorite, GIMP). I think if I become a little more familiar with Picasa's Retouch, I will probably use it more often.

Making a slide-show is really making a movie, or making a video. Once I had settled on about 50 useful images I selected them in Picasa and chose the Make a Movie icon at the bottom of the screen. A window of tabs, similar to the edit tabs opens at the left of the screen, allowing you to add a sound track, change resolution, create transitions, and add text slides. All in all, not that bad. However the sound track never sounded right to me, so I finally left Picasa's Movie maker in the dust.
There seem to be quite a few choices in free movie movie making programs. Windows Movie Maker comes free with Vista and XP, and there is a new version that is part of the recent "Windows Live" effort from Microsoft. Then there is Pinnacle's VideoSpin, also free with a bit more features than Movie Maker. And don't forget Cinelerra, Open Movie Editor, and Kdenlive 0.7 for Linux. Well, I didn't choose any of these. Instead I used Photo Story 3 for Windows. It too is free, but you have to download it from Microsoft. The URL is so long, just do a Google search.
I have used Photo Story 3 for Windows in many of my slide-show classes. The thing I like best is the ability to customize the start-stop locations of the "Pan and Zoom" motion feature within a single slide. The rest of the program is pretty straight forward with the final product being a wmv file along with a project file (.wp3), allowing you to go back and edit the movie without starting over. If you want more help with Photo Story 3 for Windows, check out http://www.papajohn.org/. I will probably, as time allows, try some of those other movie makers with latter projects. I 'll keep you posted.
The final slide-show/video Doors 09, is about 4 minutes long and can be seen over at You Tube.
http://www.youtube.com/watch?v=D3-jszGlXcI
After finishing all the photographing of my old 35mm negatives, I have begun cleaning them up (removing dust spots, scratches, etc.) to use them in new fun and creative ways. The plan was to make a a slide show or video, using Picasa.
I started by picking about 120 photos taken during the 1980s of doorways around Portland Maine. I was looking for contrasts, textures, and even occasional humor in the images. Picasa has a feature called, "Retouch" found in the Basic Fixes tab that is fairly useful once you get the hang of it, for removing the occasional dust spot. I tried to use it exclusively, but found myself resorting to Photoshop Elements every now and then (and don't forget our old favorite, GIMP). I think if I become a little more familiar with Picasa's Retouch, I will probably use it more often.
Making a slide-show is really making a movie, or making a video. Once I had settled on about 50 useful images I selected them in Picasa and chose the Make a Movie icon at the bottom of the screen. A window of tabs, similar to the edit tabs opens at the left of the screen, allowing you to add a sound track, change resolution, create transitions, and add text slides. All in all, not that bad. However the sound track never sounded right to me, so I finally left Picasa's Movie maker in the dust.
There seem to be quite a few choices in free movie movie making programs. Windows Movie Maker comes free with Vista and XP, and there is a new version that is part of the recent "Windows Live" effort from Microsoft. Then there is Pinnacle's VideoSpin, also free with a bit more features than Movie Maker. And don't forget Cinelerra, Open Movie Editor, and Kdenlive 0.7 for Linux. Well, I didn't choose any of these. Instead I used Photo Story 3 for Windows. It too is free, but you have to download it from Microsoft. The URL is so long, just do a Google search.
I have used Photo Story 3 for Windows in many of my slide-show classes. The thing I like best is the ability to customize the start-stop locations of the "Pan and Zoom" motion feature within a single slide. The rest of the program is pretty straight forward with the final product being a wmv file along with a project file (.wp3), allowing you to go back and edit the movie without starting over. If you want more help with Photo Story 3 for Windows, check out http://www.papajohn.org/. I will probably, as time allows, try some of those other movie makers with latter projects. I 'll keep you posted.
The final slide-show/video Doors 09, is about 4 minutes long and can be seen over at You Tube.
http://www.youtube.com/watch?v=D3-jszGlXcI
Friday, September 18, 2009
Digitizing Black & White Negatives
During the 1970s and 80s, I spent a great deal of time working with black and white photography. Like so many others, I truly enjoy the beauty of a nice “gray scale” image. Using my 35 mm cameras and trusty old Tri-X, I created over 3000 images.


I was teaching photography to high school students in Kennebunk, Maine during those days, so I had plenty of darkroom time. In addition, I built a few photo labs of my own at the various places I lived. I remember telling the photography students there would come a time when we used some form of electronic image capture in place of film. Some thought that sounded cool, others laughed.

Most of my best black and white work made it into print form; 5x7, 8x10, 11x14, some matted, most just stored in boxes. I threw out many photographs, but I still have some of those original prints. (I even coated various materials, glass, leather, stone, with emulsion and made prints on those surfaces.)
Well I ended up with this binder of about 2800 35 mm black and white negatives, some were made into prints and have since been scanned, and others are still only negatives. (I also have a collection of slides, color negatives, and large format negatives, but that’s a story for another time.)

So about ten years ago, I decided that I would find a way to digitize these negatives. And now, the job is finally done. I used a slide copying adapter (Nikon ES-E28) that screwed on to the lens of my Nikon Cool Pix 4500. The 4500 was one of the best cameras in its day (and still has many design features superior to today’s digital cameras), but mostly I bought it because of the adapter. It not only has the ability to crop and zoom and thus copy 35mm slides, but it also includes a negative holder, that allows you to re-photograph 35mm film. I have never seen anything as versatile or convenient as this device, since. If anyone has any suggestions for similar equipment, please share this with us all.

Photographing 35 mm negatives has its problems – DUST. You will either spend hours cleaning your negatives or hours using computer software to remove the specs, but we had those problems when we printed onto paper from negatives. Then there is getting the light right. The adapter is illuminated by whatever light source you point it at. Over the years I got lazy sometimes and simply pointed the thing out the window, and cranked one negative through after another. This sloppy, uneven illumination shows in some of the negatives. And finally, this process takes forever (or ten years in my case). It becomes a bit tedious, and after a few hundred shots, one tends to put the project aside for a few months.
Well anyway, the photographing part is done (I still have the slides, color film and larger format negatives, but…). At this point I used a great program called Irfanview, http://www.irfanview.com/, to convert the negatives to positives and reduce the color level to grayscale. This can all be done in one batch process, using Irfanview.

There is something to be said for working with the positive (reversed negative) images while in color, e.g. not converting them immediately to grayscale. You can work with the different colors as layers to achieve effects similar too using filters. But I am happy just getting all those negatives into a massive collection of B&W images. Besides, the negatives were captured in color and are all stored as jpgs in color.

%20no-repeat%20left%22%3E%3Ca%20href=%22http://picasaweb.google.com/pashleyG/LakesPark?feat=embedwebsite%22%3E%3Cimg+src%3D%22http://lh5.ggpht.com/_lXRmY4SwyuE/SsXrDudSytE/AAAAAAAAGZ4/90dmt5S4eGE/s160-c/LakesPark.jpg%22+width%3D%22160%22+height%3D%22160%22+style%3D%22margin:1px+0+0+4px;%22%3E%3C/a%3E%3C/td%3E%3C/tr%3E%3Ctr%3E%3Ctd+style%3D%22text-align:center;font-family:arial,sans-serif;font-size:11px%22%3E%3Ca+href%3D%22http://picasaweb.google.com/pashleyG/LakesPark?feat%3Dembedwebsite%22+style%3D%22color:#4D4D4D;font-weight:bold;text-decoration:none;">Lakes Park</a></td></tr></table>)
Now, what do I do with all 2000 images? I think I’ll make a movie with a few of them, limiting myself only to the tools found in Picasa, but that’s for a later post.
Subscribe to:
Posts (Atom)